Installation & Support Center
Reverse Osmosis Systems
-
 Basic Tools required
-
Basic Installation Skills Required
-
40-50 min installation
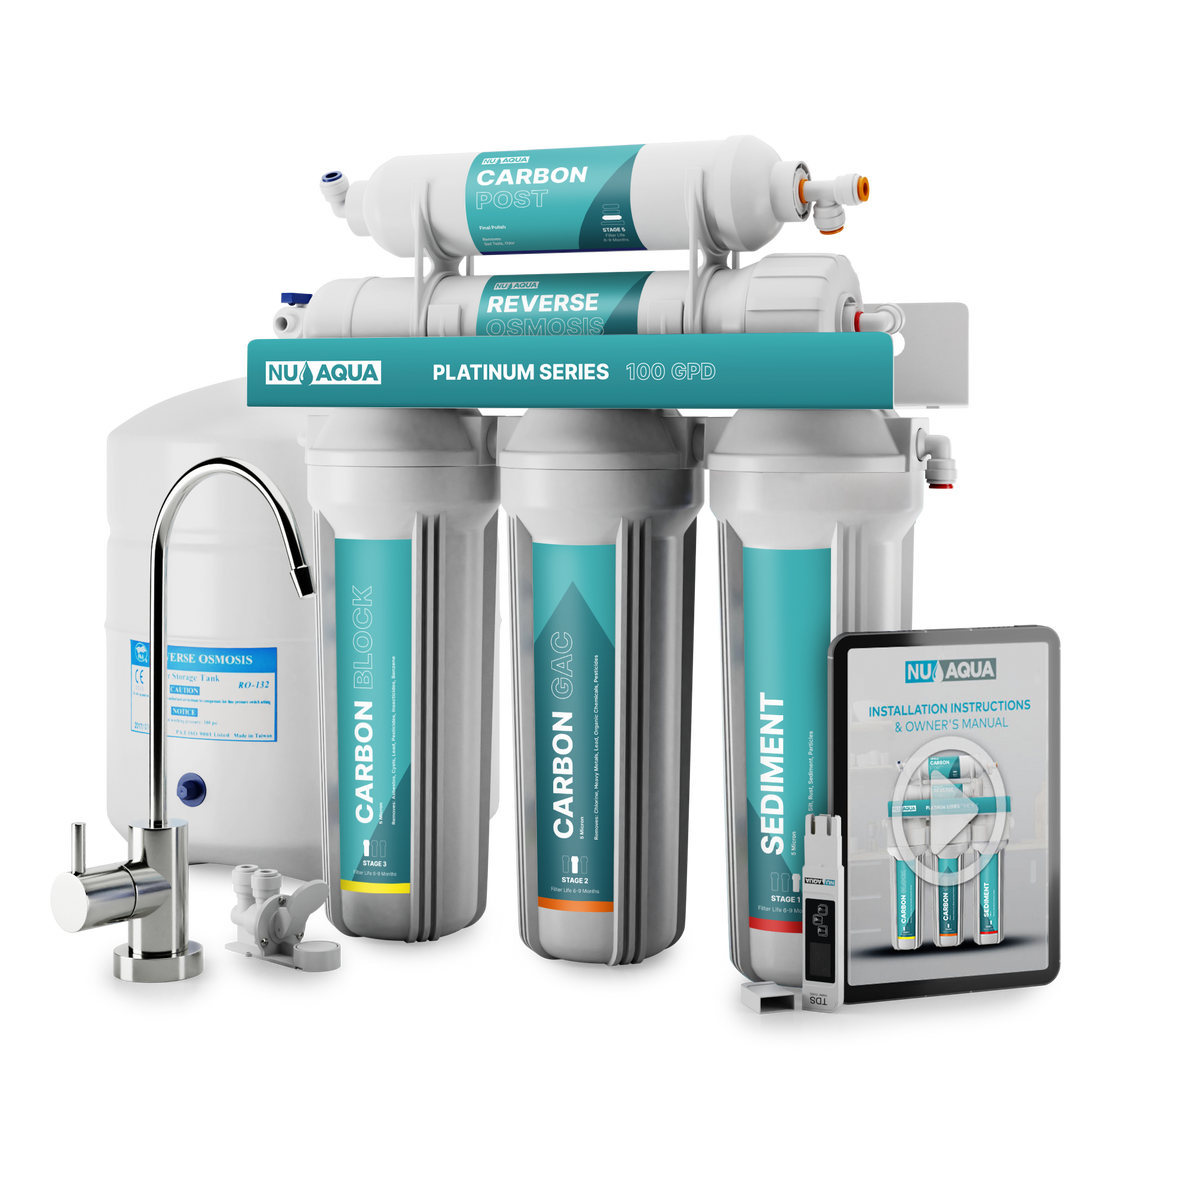
5 Stage RO System
6 Stage Alkaline RO System
6 Stage Ultraviolet RO System
7 Stage Alkaline & UV RO System
Replacement Filter Guide
-
Basic Tools Required
-
Basic Installation Skills Required
-
>40 min Installation
Watch Installation Guides
Watch Filter Replacement
-
 Save 10% on Each Shipment
-
 Cancel Anytime!
-
 Get Lifetime Warranty!


-
Professional and Expert Advice
-
Professional Tools and Experience
-
Expert Installation Saves You Time


You May Find This Useful Too


Frequently Asked Questions
Before you begin, gather the following:
- Basic plumbing tools: adjustable wrench, screwdriver (flathead & Phillips), tube cutter (for hard pipe models), and pliers
- Teflon tape (plumber’s tape) for sealing threaded connections
- Pipe fittings/adapters as specified in your system’s manual (e.g., ½″ or ¾″ NPT)
- Mounting hardware if installing wall-mounted models (anchors and screws included in kit)
Safety gear: gloves and safety glasses Refer to Section 2 of your system’s installation manual for model-specific requirements.
- Cold water feed line: Install on the cold-water supply only
- Accessibility: Ensure 6–12 inches clearance around the unit for filter changes and maintenance
- Stable surface: Mount securely to a wall or under-sink bracket (depending on model)
- No direct sunlight or freezing risk: Avoid areas where temperature can drop below 40 °F (4°C)
Most systems require a minimum inlet pressure of 45 psi (3.1 bar) and a maximum of 80 psi (5.5 bar).
- Too low: Reduced flow rate or no flow
- Too high: Risk of leaks or damage
To check pressure:
- Shut off water supply and attach a pressure gauge to a nearby faucet or hose bib.
- Turn water back on and read the gauge.
If your pressure is outside the recommended range, install a pressure regulator or contact a professional plumber.
- Use Teflon tape: Wrap 3–4 turns clockwise around male threads
- Hand-tight + quarter turn: After hand-tightening, use a wrench to turn an additional ¼–½ turn—do not over-tighten
- Check alignment: Ensure fittings are straight; cross-threading causes leaks
- Pressure test: After installation, slowly turn on the water and inspect all connections for 2–3 minutes before securing the unit.
- Sediment & carbon filters: every 6–12 months (depending on water quality)
- RO membrane: every 2–3 years (or when effluent TDS rises by >10 ppm over feed TDS)
- Post-carbon polishing filter: every 6 months
- Alkaline Filter: every 12 months
- UV Bulb: every 12 months
- Clogged pre-filters: Replace sediment/carbon filters
- Fouled RO membrane: Check TDS and consider membrane replacement
- Low inlet pressure: Verify upstream pressure is within 45–85 psi
- Kinked tubing or valve issues: Inspect tubing runs and open all valves fully
Your water may have a slightly milky color during the first week of use. This is caused
by tiny air bubbles in the water and will go away with use.
- Sanitize system annually: Use food-grade sanitizer following the guide in Section 6 of the manual
- Inspect fittings and tubing: Check for wear or leaks; tighten as necessary
- Monitor storage tank air charge (for RO systems): Should be 5–7 psi when empty of water
Most NU Aqua System filtration systems are designed for DIY installation by individuals comfortable with basic tools. However, if you:
- Lack plumbing experience or you're not comfortable
- Need to modify existing or older pipework
- No tools or required equipment
We suggest hiring a professional.
Need Help Selecting The Perfect Filter System?

Want to speak to us directly? We'd love to chat with you!

If you have any questions about NU Aqua filtration systems - We are here to help! Click the blue chat icon on the bottom right corner of the screen.